SMS Webb Handbok
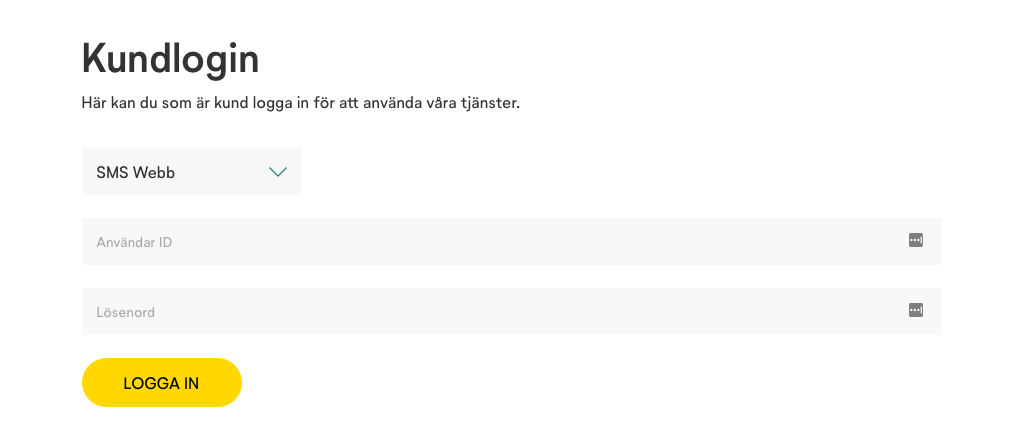
Du loggar in till SMS Webb via https://www.generic.se och kundlogin som du finner i det övre högra hörnet. Välj sedan SMS Webb i rullgardinsmenyn. Logga in genom att ange ditt användarnamn och lösenord och klicka på ”Logga in”.
Ställ in och ändra din användarinformation
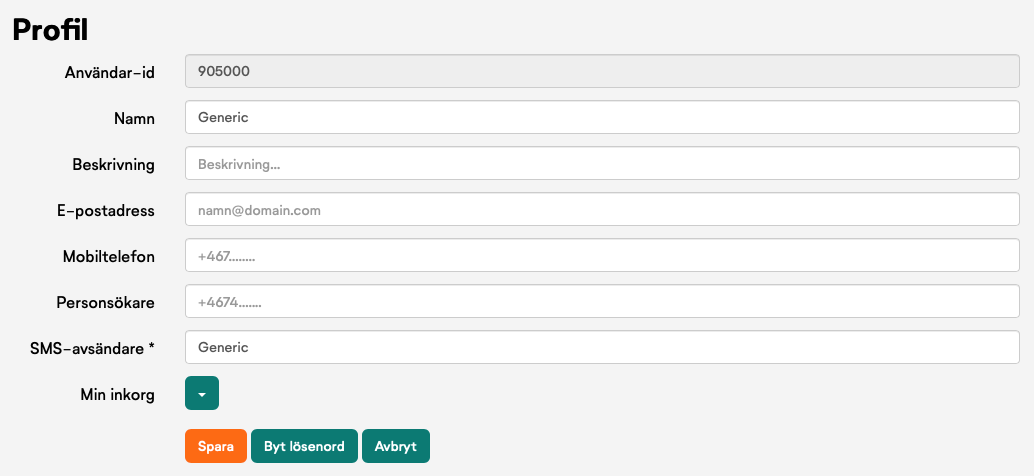
Under användarnamnet högst upp till höger och ”Min profil” kan du hantera ditt konto, t.ex. ändra lösenord och ställa in dina användaruppgifter.
Här kan du också välja vad som ska visas som avsändare av det SMS som skickas från SMS Webb. Avsändaren kan vara ett ord som är maximalt elva tecken långt eller ett telefonnummer. Väljer du ett ord är det inte möjligt att svara på de SMS du skickar. Anger du ditt eget mobilnummer som avsändare kommer eventuella svar att skickas till din mobiltelefon. Om du har telefonnummer för mottagning av SMS kopplat till ditt konto så visas de här och inställningar såsom autosvar, stoppord och URL-notifiering kan hanteras.
Autosvar: Ett svarsmeddelande som automatiskt skickas till det telefonnummer som skickar ett SMS till inkorgsnumret.
Stoppord: Funktion för inkommande SMS att spärra ett mobilnummer. Ex. avregistrering.
URL-notifiering: Funktionen kan aktiveras då SMS Gateway används för att ta emot SMS, läs mer i teknisk beskrivning för REST.
Lägg till användare
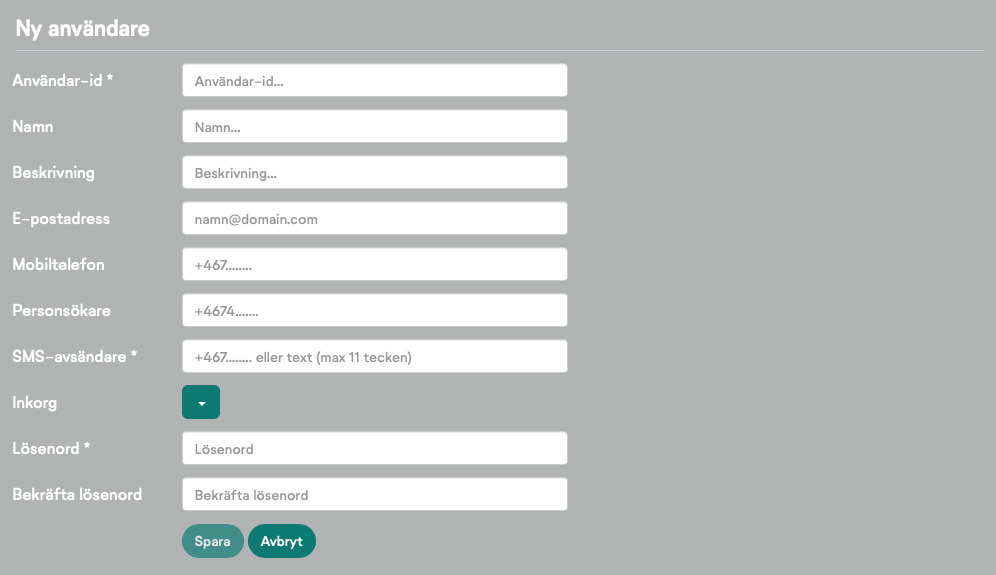
Under ”Mina användare” kan du som är har ett huvudkonto lägga till användare. Det är bara du som är tillgång till huvudkontot som ser och kan använda detta menyval. För att lägga till nya användare, klicka på ”Skapa ny användare”. Välj ett önskat användarnamn, SMS-avsändare och ett lösenord. Klicka sedan på ”Spara”. Nu kan dina nya användare logga in i SMS Webb.
Begränsa användare till att bara skicka meddelandemallar
Efter att användaren är skapad kan du som har tillgång till huvudkontot begränsa dina användare till att endast använda färdiga mallar i SMS utskick.
Gå till Mina användare, klicka på användaren som ska begränsas, och längst ner kryssar du i rutan för begränsning och väljer spara. Användaren kommer nu bara kunna använda de mallar du skapat när de skickar SMS.

Skapa mallar
Välj ”Mina mallar” i menyn för att hantera mallar. Skapa ny mall genom att klicka på knappen ”Skapa ny mall”, ge mallen ett namn och skriv den text du vill ha i mallen. Klicka därefter på Spara. Med ett huvudkonto kan du skapa och dela mallar med alla dina underanvändare. Mallarna kan också låsas så att texten i mallen inte kan ändras av underanvändaren. Klicka när mallen skapas i bockrutorna ”Delad” respektive ”Låst” för att utnyttja funktionerna. En mall kan när den används automatiskt hämta text från fälten som finns under ”Min profil”. Använd nedanstående textsträngar för detta.
{userId}: Hämtar Användar-ID från Min profil
{name}: Hämtar För - och efternamn från Min profil
{userDescr}: Hämtar Beskrivning från Min profil
{email}: Hämtar E-postadress från Min profil
{gsmNumber}: Hämtar Mobilnummer från Min profil
{{namn}}: Fritextfält. Ersätt namn med valfri text, som t.ex. ger vägledning till det som ska det som ska skrivas i fältet.
Ta bort mallar gör du genom att markera de mallar du vill ta bort med bockrutan till vänster om mallens namn och trycker därefter på knappen ”Radera valda”.

Skicka meddelanden
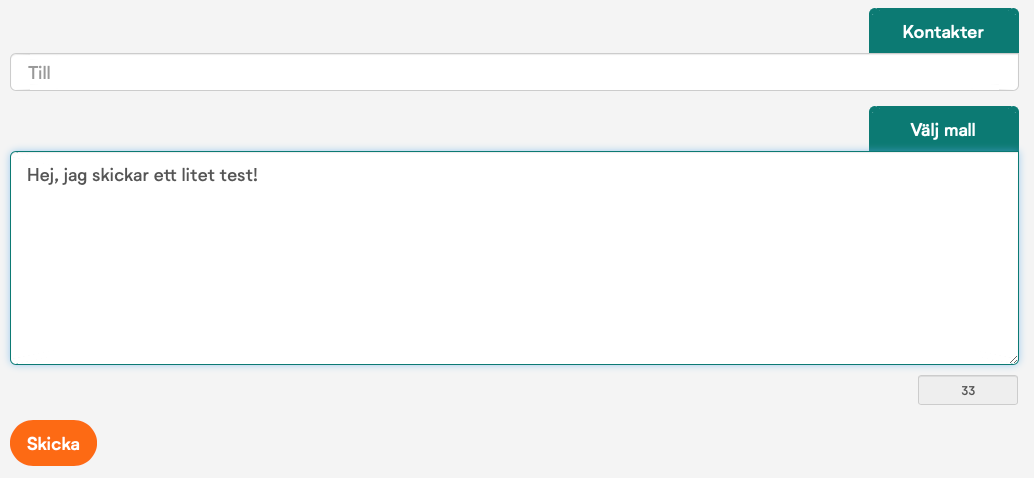
För att skicka meddelanden så skriver du i översta fältet ett eller flera telefonnummer som ditt meddelande ska skickas till. Flera telefonnummer skiljs åt med kolon eller genom Enter. Du kan också välja mottagare från ”Kontakter”. I dialogrutan som öppnas ser du dina sparade individer och grupper. Markera de kontakter eller grupper som meddelandet ska skickas till. De valda kontakterna läggs till som mottagare.
Skriv ditt meddelande i meddelandefältet. Till höger nedanför meddelandefältet framgår hur många tecken ditt meddelande är, om meddelandet är längre än 160 tecken bildas automatiskt flera SMS som skickas till mottagarna. SMS:en länkas ihop i mottagarens mobiltelefon och visas som ett meddelande.
När du har lagt till meddelandemallar hittar du dem högst upp till höger genom att klicka på ”Välj mall”. Klicka på ”Skicka” för att sända meddelandet.
Kontakter
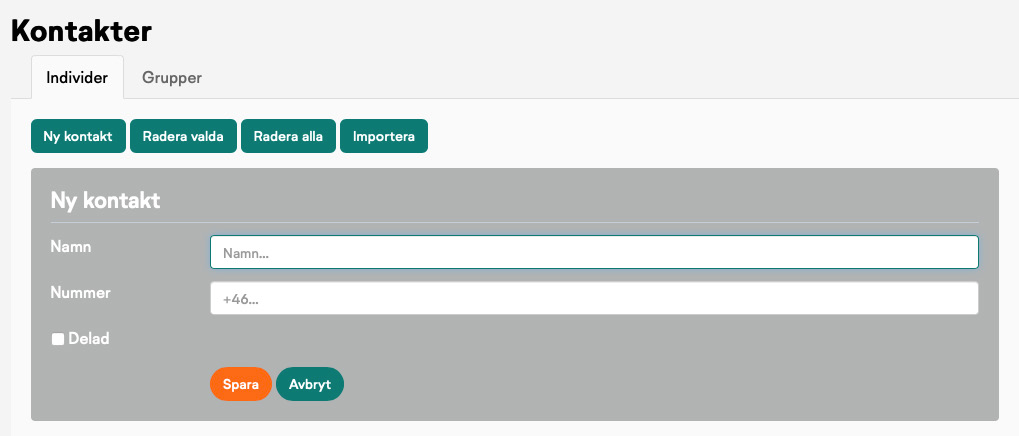
I ”Kontakter” kan du spara telefonnummer och även gruppera dessa. Välj ”Ny kontakt” för att lägga till ett telefonnummer och spara det med ett namn som du väljer själv. Under ”Grupper” kan du skapa en grupp och välja de kontakter som ska ingå i den. När du har ett huvudkonto kan du ange att en kontakt eller grupp ska delas med alla dina användare. När du delar en kontakt eller grupp kan alla användare se och använda den under sin egen inloggning men kan inte ändra eller redigera kontakten.
Importera telefonnummer från Excel-fil
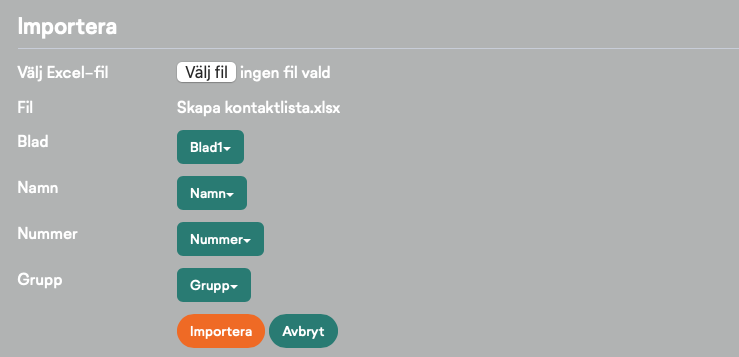
Om du vill importera flera mottagare samtidigt till Kontakter kan du göra det från en Excel-fil. Skapa filen med rubriksatta kolumner, t.ex. ”Namn”, ”Telefonnummer” och ”Grupp”. Ange namn och telefonnummer och eventuell grupptillhörighet under respektive rubrik. När filen importeras skapas kontakterna och de angivna grupperna. Grupptillhörighet är valfritt att ange i Excel-filen, när det inte anges skapas inga grupper vid importen. Klicka i SMS Webb på ”Importera”, välj Excel-fil och matcha därefter respektive kolumn mot de angivna rubrikerna. Klicka därefter på importera.

Bulk SMS
Bulk SMS används för att skicka stora mängder SMS, vid en förutbestämd tidpunkt, till telefonnummer som finns i en
Excel-fil, kommaseparerad textfil eller i SMS Webb Kontakter. Med Bulk-SMS är det också möjligt att skicka personligt
anpassade SMS.
Filformat
Filer som används i Bulk-SMS ska vara en Excel-fil eller en semikolonseparerad textfil. I filens första kolumn skall mottagarnas
telefonnummer anges, telefonnumren ska inledas med +46, 07 eller 0046 alternativt annan landskod då SMS skickas
utomlands. Telefonnumren i filen ska så långt som möjligt innehålla enbart siffror men Bulk SMS funktionen rensar per
automatik bort eventuella bindestreck (ej talstreck), snedstreck och mellanslag som finns i telefonnumren. Sådana tecken
behöver alltså inte rensas bort från filen. Observera att det inte får förekomma tomma rader i filen, en tom rad tolkas som
slut på telefonnummer vilket resulterar i att telefonnummer som finns efter den tomma raden inte kommer med i utskicket.
Tomma rader kan enkelt tas bort genom filtrering eller sortering i Excel. I filens andra, tredje, fjärde kolumn o.s.v. kan t.ex.
personlig information anges, t.ex. namn, adress eller liknande. Informationen kan infogas i respektive SMS.

Skapa ett utskick
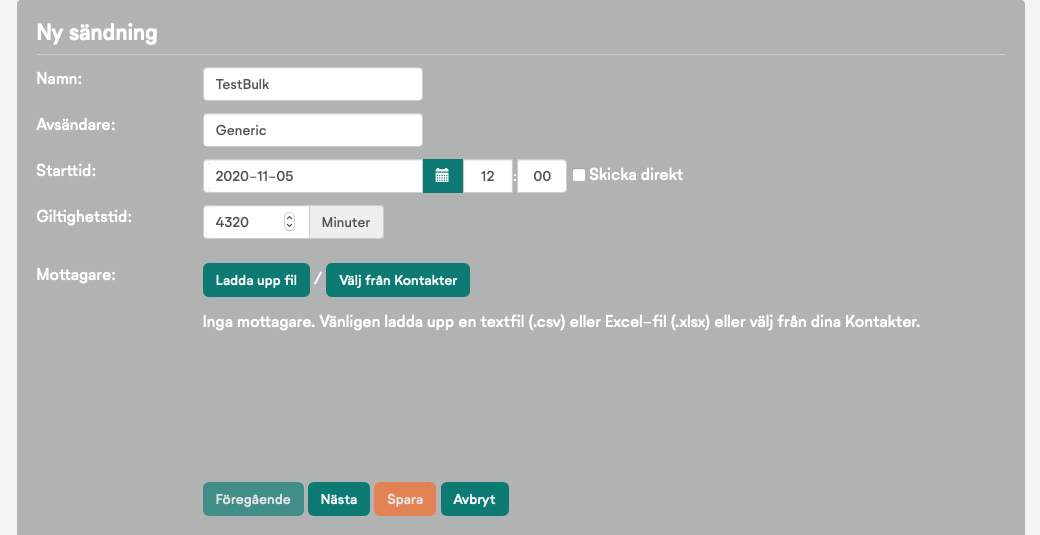
För att skapa ett Bulk SMS utskick klickar du på Bulk SMS och ”Ny sändning”, och ger sändningen ett godtyckligt namn, en starttid och en avsändare.
Avsändare: Är det ord eller telefonnummer som kommer att visas som SMS-avsändare för de telefonnummer du skickar till.
Giltighetstid: Gör det möjligt att styra hur länge ett olevererat SMS ska vänta på att bli levererat. Om giltighetstiden t.ex. sätts till 5 minuter levereras inte SMSet till telefonnummer som inte går att nå inom 5 minuter från det att utskicket gjordes. Det normala är att ett SMS lever i 72 timmar (4320 minuter).
Välj mottagare: Välj de mottagare som dina SMS ska skickas till, antingen genom att ladda upp en fil eller välja från Kontakter.
Skriv meddelande: I andra steget skriver du ditt meddelande. Du kan skriva fritext, använda mallar eller välja att hämta information från din fils kolumner, och från Kontakter. Innehållet hämtas till meddelandetexten genom att skriva {1}, {2} o.s.v. utifrån vilken kolumn du vill hämta information från. När mottagare väljs från Kontakter kan endast {1}, som infogar det namn som mottagaren är sparad som, användas. Observera att första kolumnen i en fil anges som {0}.
Förhandsgranska: Med förhandsgranskningen är det enkelt att stega igenom de första SMSen i utskicket för att verifiera att de innehåller rätta information.
Stopplista
Stopplista är en funktion som säkrar att SMS inte skickas till angivna telefonnummer som finns i stopplistan. Det är möjligt att som administratör och underanvändare ha unika stopplistor. Det är möjligt att knyta ett prefixord t.ex. ”STOPP” till stopplistan. När SMS tas emot på det aktuella prefixordet läggs det avsändande telefonnumret automatiskt till i stopplistan tillsammans med tidpunkt och noteringen ”Begäran från telefonnummer”. Automatisk hantering av stopplistan kräver ett aktiverat inkorgsnummer.
Stopplistan administreras i menyvalet ”Min Profil”, där stoppord per inkorgsnummer anges, samt i menyvalet Stopplista där telefonnummer som ingår i stopplistan visas och kan administreras. Telefonnummer tillsammans med en notering kan läggas till i stopplistan som även visar tidpunkt då telefonnummer lades till i listan. Det är möjligt att radera telefonnummer ur stopplistan.
Meddelandelogg
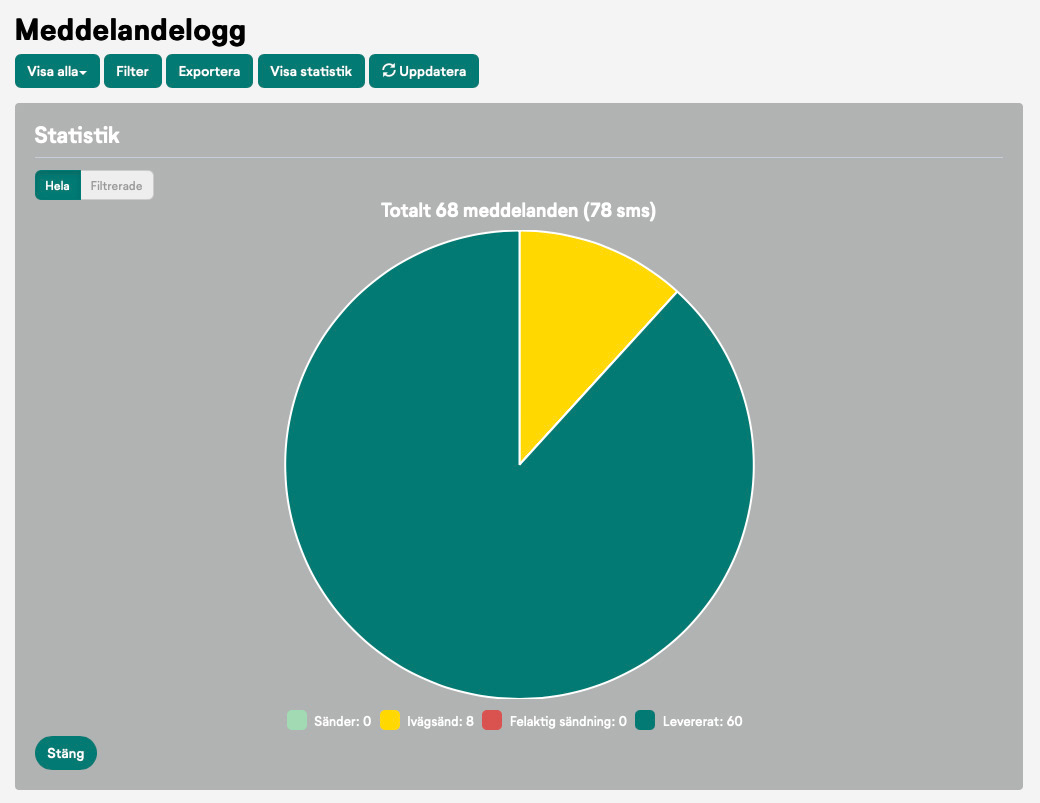
I Meddelandeloggen ser du tider, mottagare, meddelande och status för dina sändningar. Vill du exportera hela eller delar av
loggen till Excel klickar du på knappen ”Exportera”. Du kan även se statistik för hela eller delar av dina sända meddelanden
genom att klicka på knappen ”Visa statistik”.
I loggen kan du se när meddelandet skickades, avsändare, mottagare, meddelande, antal SMS, status och statustid. Status finns i 4 olika nivåer:
- Sänder: SMS håller på att sändas
- Ivägsänt: SMS är skickat men kvittens för mottaget SMS har ännu inte inkommit
- Felaktig sändning: SMS har inte levererats, inga fler försök kommer att göras, det går inte att leverera SMS:et
- Levererat: SMS:et har levererats till mottagaren
Sign Up
Sign Up är en tilläggsfunktion i SMS Webb som ger dig möjlighet att skapa en grupp som kunder själva med SMS kan anmäla sig till respektive avanmäla sig ifrån.
Gruppen ger du ett namn som du använder för att från SMS Webb skicka SMS till alla telefonnummer som vid tillfället finns i gruppen. Till gruppen finns två prefixord på ett telefonnummer kopplade, ett startord och ett stoppord, vilket ger möjlighet att med SMS anmäla respektive avanmäla sig från en grupp. Exempelvis kan orden START och STOPP på kortnummer 71720 vara knutna till en grupp. Detta innebär att SMS med ordet START som skickas till kortnumret 71720 anmäler det avsändande telefonnumret till gruppen och ordet STOPP till 71720 avanmäler det avsändande telefonnumret från en grupp.
Förutsättningen för att skapa en Sign Up grupp är att du har två stycken prefixord på ett telefonnummer, vilket erhålls av Generic vid beställning av funktionen.
Skapa en ny prenumerationslista genom att välja ”Sign Up” i menyn till höger och därefter trycka ”Ny Sign Up grupp”. Ge gruppen ett namn och ange de prefixord som du fått från Generic och vill knyta till gruppen.
Schemalägg dina utskick
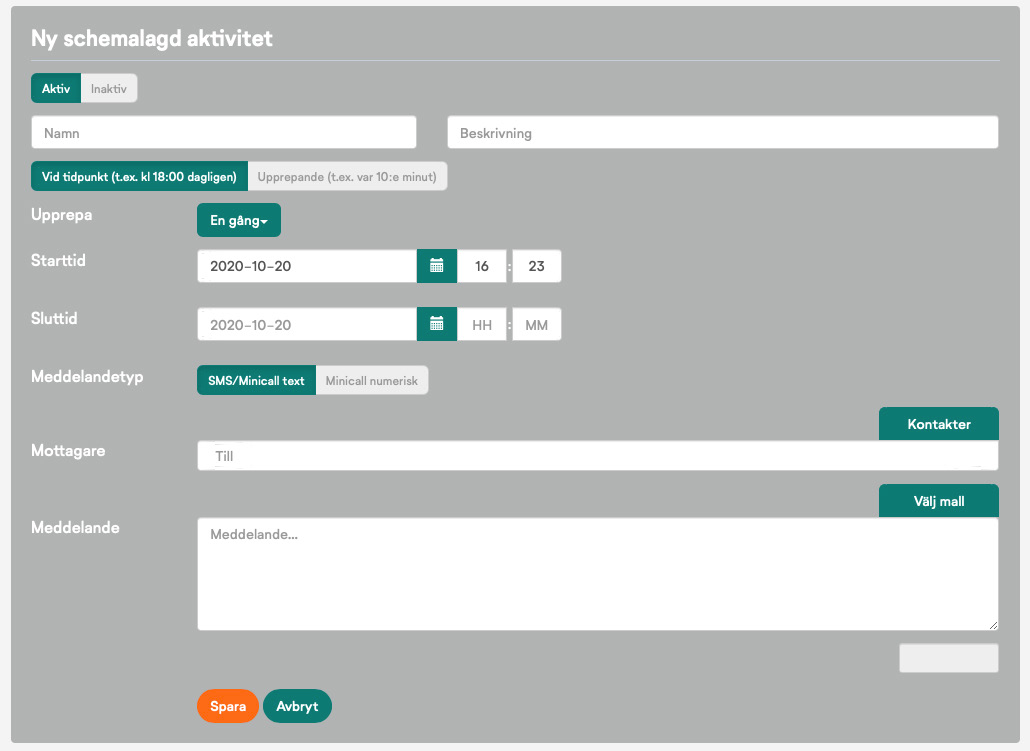
Ställ in så att meddelanden skickas vid en specifik tidpunkt eller till exempel varje timme. Välj ”Schemaläggning” i menyn och klicka på ”Ny schemalagd aktivitet”.
Aktiv: Om din schemalagda aktivet ska vara aktiv eller ej
Upprepa: Välj om, och hur ofta ditt meddelande ska upprepas
Starttid: Den tidpunkt du vill att meddelandet ska skickas
Sluttid: Den tidpunkt det schemalagda meddelandet upphör
Meddelandetyp: Typ av meddelande du vill skicka
Mottagare: De mottagare du vill lägga till för utskicket, skriv nummer direkt eller välja bland kontakter.
Meddelande: Det meddelande som skickas enligt din schemaläggning
Inkorg
I Inkorgen visas mottagna SMS. Antalet nya SMS visas efter inloggning med en siffra vid menyvalet ”Inkorg”. När sidan Inkorg är aktiv, samtidigt som nya SMS inkommer visas det med en siffra vid knappen för uppdatera. Siffran visar antalet olästa SMS som kommer att visas då du väljer att klicka på knappen uppdatera.
Det är även från inkorgen möjligt att svara på mottagna SMS, inkorgens telefonnummer sätts då som avsändare. I inkorgen visas aktuella SMS-konversationer som grupperas per telefonnummer som man mottagit SMS ifrån. Mottagna och skickade SMS visas när du klickar på en rad i inkorgen. Det senaste som hänt i konversationen visas längst ner i flödet. Det är möjligt att radera mottagna SMS i en konversation så väl som hela konversationen.
Ett huvudkonto kan ha en inkorg som består av en nummerserie på t.ex. 10 telefonnummer, det innebär att användaren kan ta emot SMS på 10 olika telefonnummer och eventuella svar visas samtidigt i inkorgen. En Administratör kan även tilldela sina underanvändare inkorgsnummer.
I inkorgen finns möjlighet att filtrera och exportera meddelanden. Du kan filtrera på avsändande telefonnummer, mottagande telefonnummer och tidsspann. En export utförs till en Excel-fil.
Det är möjligt att ange ett autosvar som automatiskt skickas till den som skickar ett SMS till ett inkorgsnummer. Autosvaret anges per inkorgsnummer och hanteras under Min Profil, eller under Mina användare (för huvudkonton). Du kan även väljas att avisera inkomna SMS till ett telefonnummer eller en e-postadress. En avisering skickas då för varje SMS som tas emot i Inkorgen. Aviseringen konfigureras under Min Profil och kan enkelt med en bockruta justeras mellan på/av

Multisök / SMS Grupp
Används för att administrera Multisök och SMS Grupp. Välj hur dina meddelanden ska levereras, du kan välja flera alternativ, t ex både som uppringt, SMS och e-post.
Vill du ha dina meddelanden levererade både uppringt och som SMS så skriver du ditt telefonnummert två gånger, välj text för vanliga SMS, och Uppläst för uppringd leverans. Avsändare på det uppringa meddelandet kommer vara Multisök /Grupp SMS numret. För SMS kan du själv ange den avsändare som ska visas och för e-post kan du välja en egen ämnesrad. Vill du behålla den ursprunliga SMS avsändaren kryssar du i ”behåll ursprunglig SMS avsändare”
